
Mailbox migration is a critical part of Exchange server migration. However, mailbox migration can cause downtime and interrupt email services as the database goes offline. However, you can your migrate mailbox from your old or current Exchange server to another without impacting the current Exchange server infrastructure by using a third-party Exchange migration software.
In this guide, we discussed steps to migrate mailbox from Exchange Server 2010 or 2013 to Exchange server 2016 or 2019 using Exchange Admin Center (EAC) and third-party EDB to PST converter software tool.
Migrate Mailbox from One Exchange Server to Another- Step by Step
To migrate mailbox from one Exchange server to another, you need to convert or export the mailboxes from the Exchange database file or EDB to PST format. After exporting the mailbox to PST, you can import the PST file to a mailbox on another Live Exchange server to complete the mailbox migration.
In Exchange 2010 SP1 or later versions, you can use the New-MailboxExportRequest cmdlet to create mailbox export requests and convert the mailboxes from the Exchange database to PST format. In Exchange 2013 and later, you can also use the Exchange Admin Center to export mailboxes to PST format.
The steps are as follow,
Step 1: Assign Mailbox Import Export Role
Mailbox Import Export management role is required to export or import mailboxes in the Microsoft Exchange server. This role is not even assigned to the administrator by default. Thus, you must assign it to the administrator account or any other user account that you will be using to migrate Exchange mailboxes.
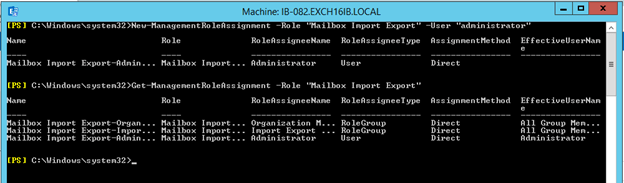
You must assign this role on both source and destination Exchange servers. To assign this role to the administrator, open Exchange Management Shell (EMS) and execute the following command,
New-ManagementRoleAssignment –Role "Mailbox Import Export" –User "administrator"

After this, execute the following PowerShell command in EMS to check if the Mailbox Import Export role is assigned to the administrator.
Get-ManagementRoleAssignment -Role "Mailbox Import Export"
Step 2: Create UNC File Path
You also need to create a UNC folder where exported mailbox PSTs will be saved. To create a UNC folder path, follow these steps,
Check out: How to open TRN File Using MKS App or SQL Server
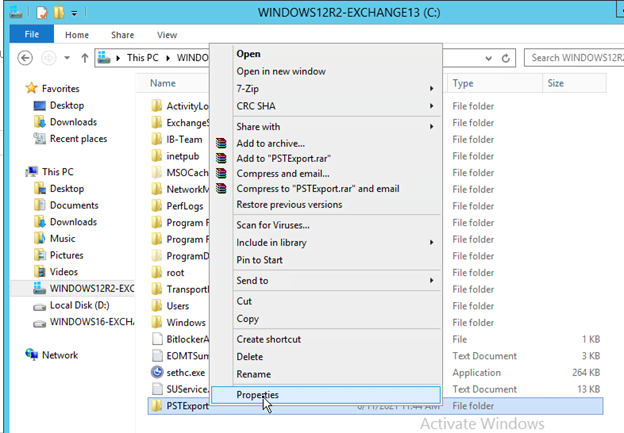
- Go to the C:\ drive and create a new folder. For instance, we created a folder named
- Right-click on this folder and choose
- Click the Sharing tab and then click on the Advanced Sharing.

- Click the ‘Share this folder’ checkbox and then click Permissions.

- Click ‘Add.

- Then type Exchange and click ‘Check Names.’

- From the list, choose ‘Exchange Trusted Subsystem’ and click ‘OK.’
- Similarly, find and choose the ‘Authenticated Users’ and click

- Click ‘Authenticated Users’ and enable the Change permission checkbox under the ‘Allow’ column.

- Similarly, click ‘Exchange Trusted Subsystem’ and enable ‘Change’ permission.

- Click ‘Apply>OK>Apply>OK’ and then copy the UNC path.

- Close the Folder properties and go back to Exchange Admin Center.
Step 3: Export Mailbox to PST
Now you are ready to export and migrate Exchange mailboxes to Live Exchange server. The steps are as follow,
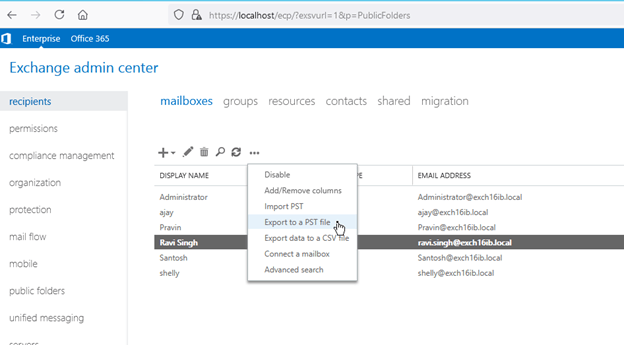
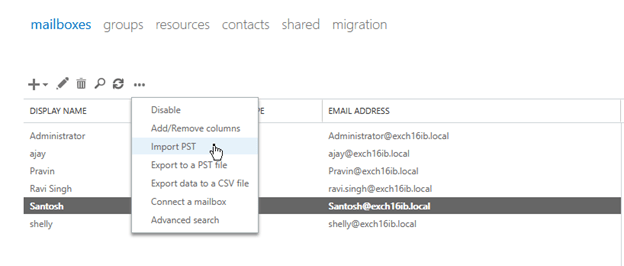
- Open EAC, click ‘recipients’ and select the mailbox that you want to migrate to Live Exchange server.
- Click on the three dots … (more icon) and then choose ‘Export to a PST file.’
- Select ‘Export only the contents of this mailbox’ and click ‘’
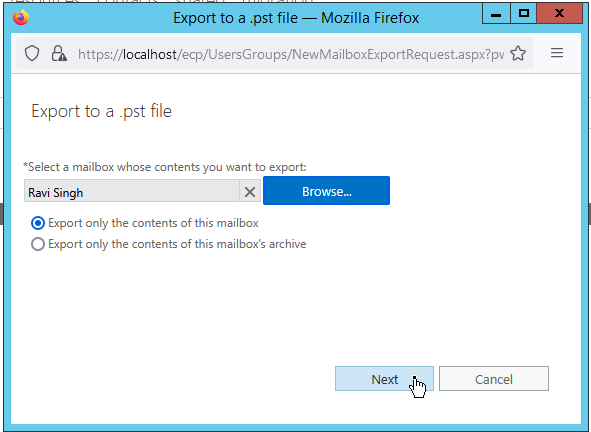
- Paste the copied UNC folder path here and also name the PST file. Click ‘’

- Choose user where the email will be sent once the mailbox is successfully exported to the PST file. Then click ‘’

- Similarly, you can export other mailboxes to PST and then copy these PST files to Live Exchange server where you want to migrate the Exchange mailboxes.

Step 4: Import PST to Finish Exchange Mailbox Migration
To import a PST file to a mailbox on the Live Exchange server, you must assign the Mailbox Import Export role and create a UNC Folder path as discussed in Step 1 and Step 2. Also, copy the PST files from the source UNC path to the destination Exchange server’s UNC path folder. Then follow these steps,
- Open EAC on destination Live Exchange server, click ‘recipients,’ and choose the mailbox where you want to import the PST. You may also create a new mailbox on the destination server.
- Click … and choose Import PST.
- Paste the PST file path (stored in the UNC folder path) in the box and click ‘Next.’

- Keep all options as default and click ‘Next.’

- Then click ‘Finish.’ This will start importing the PST to the selected mailbox. You can check the progress via notification.

Repeat these steps to migrate all the mailboxes.
Conclusion
Although you can export and migrate mailbox through EAC, this method is not recommended when you need to migrate several mailboxes, as this could take a lot of time and effort. Also, this does not work when you need to migrate mailboxes from an offline Exchange database.
An easier and more convenient way to migrate mailbox from one Exchange server to another is to use a reliable EDB to PST converter software, such as Stellar Converter for EDB.
Unlike manual methods, the software can export multiple mailboxes from both online and offline EDB files without utilizing server resources or impacting the server performance. In case of a damaged or corrupt EDB file, you can use Stellar Repair for Exchange to extract and migrate mailboxes. Both software can export the single or multiple mailboxes at 4x speed from one Exchange server directly to Live Exchange server. The software automates the entire process, thereby saves time and helps avoid downtime.
Check out: How To Keep Secure Your Mac Devices From Cyber Attacks